Using onWebChat
onWebChat platform is user-friendly, with well-structured pages designed for ease and efficiency.
Dashboard
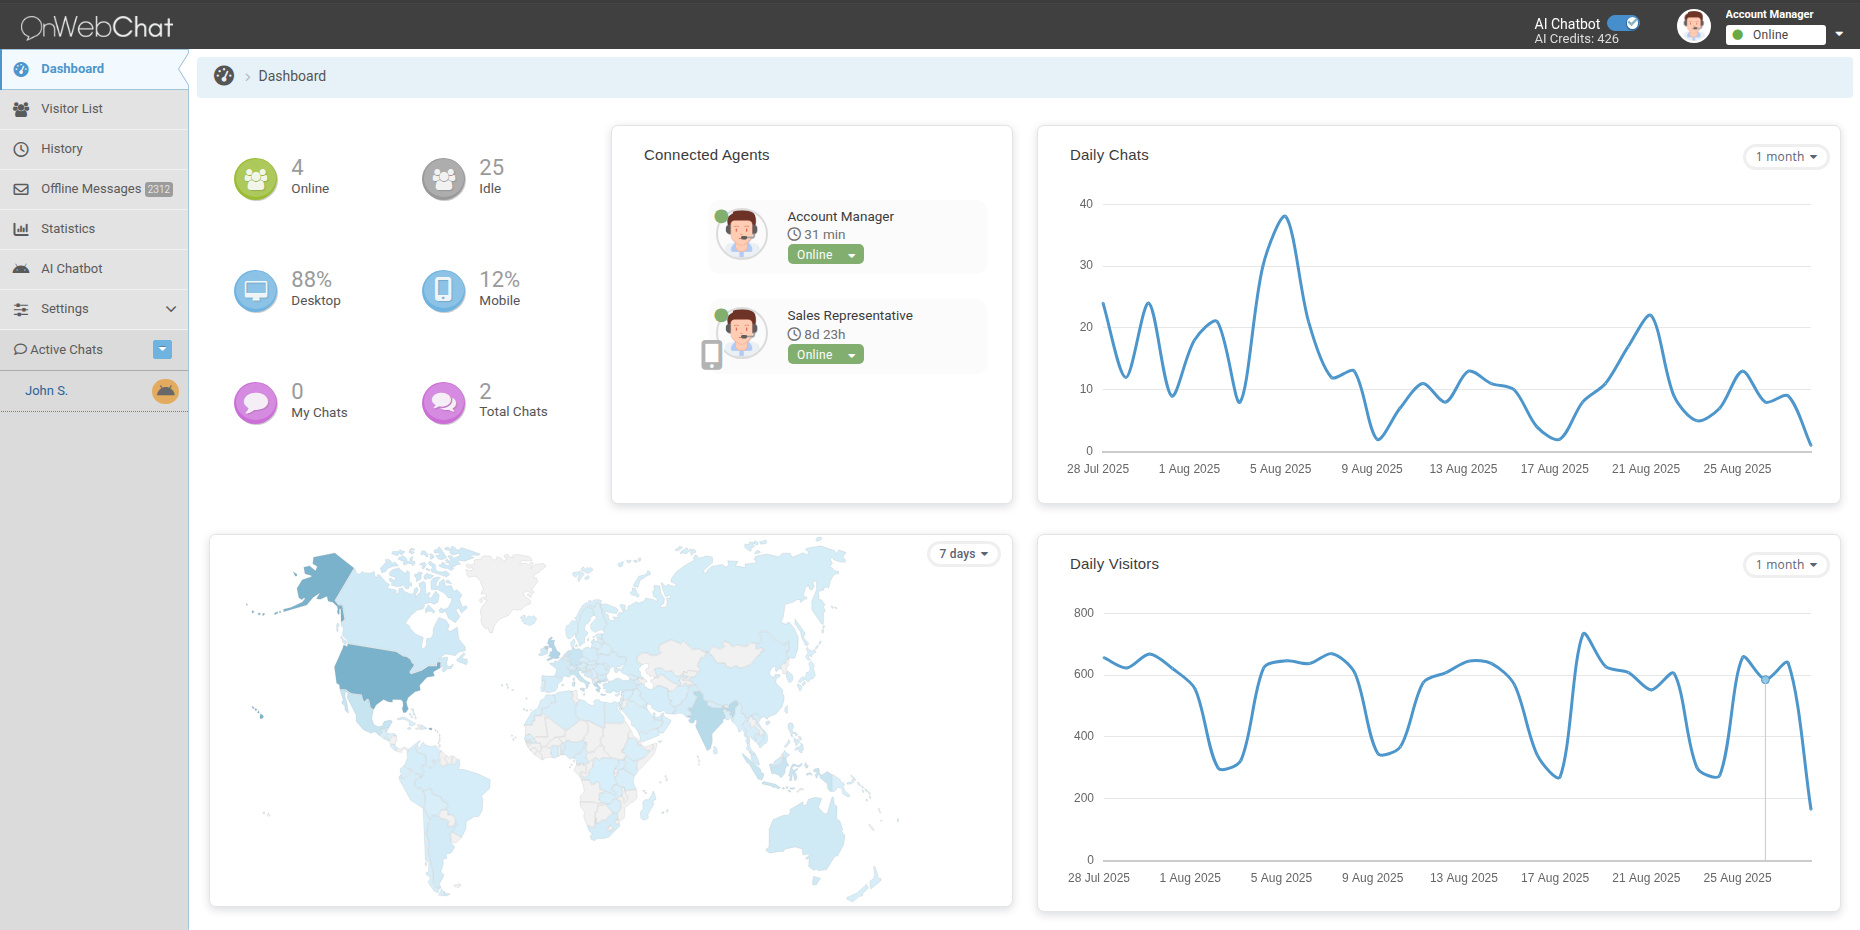
When you connect to our dashboard, you'll first see the Overview page, which provides key insights and a summary of your live chat activity, as shown below.

In the top left corner of this page, you can see daily and instantaneous statistics for your website at a glance.
You can view the number of visitors, whether they are connected via PC or mobile phone, and the number of dialogs that have taken place that day.
Additionally, you can see which agents are currently connected to the system.
The right side of the screen displays two useful charts: daily conversations and daily visitors.
Chat Page
This is where you can communicate with your website visitors. You can access this page by answering an incoming chat that appears on the left, or by initiating a chat with one of your visitors from the Visitors page (see below).

The chat window occupies most of the page. You can type your messages in the lower section of this window.
The right side of the page displays visitor information that is automatically collected by the onWebChat system, including country, operating system, and browser details. You can also view visited pages and the complete chat history with each visitor.
In addition to system-gathered information, you can save personal notes for each visitor, giving you easy access to this data for future interactions.
Visitors Page
Here, you can view all current website visitors along with useful information about them.

By clicking on a visitor on this page, you can initiate a chat with them.
onWebChat makes it easy to find specific visitors by offering categorization options based on different criteria. You can also use the convenient search tool to find visitors using any criteria you prefer.
History Page
This page displays past chats from all visitors.

Click on any past conversation summary to view the complete dialogue between the visitor and agent.
The top right corner features a convenient search tool that allows you to search the entire chat database using any criteria (agent name, visitor name, dialogue text, etc.).
Offline Messages Page
This page displays all offline messages sent by visitors through your chat window while you were unavailable.
The latest messages appear at the top of the list, showing visitor details, timestamp, and message preview. Click on any row to view the complete message on the right side. If the "send mail" button doesn't work in your browser, you can copy the visitor's email address and reply using your preferred email application.
The search tool is also available in the top right corner of this page.
Statistics Page
This page provides comprehensive statistics about your visitors and agents.
You can select a date range to view useful metrics for each agent, including total chats handled and average chat duration.
Two helpful graphs appear at the bottom: daily chats and daily visitors.
Settings Page

The settings page includes the following sections:
- Installation Code
- Widget
- Agents
- Shortcuts
- Sounds
- Blocked Visitors
- Triggers
- Departments
- Security
Installation Code
In this section, you’ll find your unique Chat ID, required when installing onWebChat through one of our plugins. For manual setup, the full installation code is also provided here.
Widget Page
This page allows you to customize the look and feel of your chat widget. You can adjust colors, images, and text, as well as configure features such as the Offline Form, Pre-Chat Form, and more.
Agent Settings
Here you can add new agents or edit existing ones. Agents can be assigned one of two roles: Agent or Administrator. Administrators have full access to all settings, including widget appearance, text customization, agent and trigger management, chat history deletion, and subscription handling.
Shortcuts
Shortcuts are pre-written messages saved in the system. Instead of typing the same welcome message each time you chat with a visitor, you can use shortcuts. Simply type a few letters, and matching shortcuts will appear for easy selection. You can create new shortcuts and edit existing ones here.
Sound Settings
Configure various sound alerts and desktop notifications for the onWebChat platform, including notifications for new messages and website visitors.
Blocked Visitors Page
View all blocked visitors and unblock them if needed. You can block visitors from the chat page to prevent them from seeing the chat window or contacting you.
Triggers Page
Add or edit automated message triggers. Triggers send predefined messages to visitors based on rules you establish. For example, if a visitor stays on your pricing page for more than 20 seconds, you can automatically send them a helpful message.
Departments
Set up departments and assign agents to each one. Visitors can choose their preferred department (e.g., Sales, Support) to connect with the most appropriate agent.
Security
Restrict your chat widget to display only on authorized websites.